
Cooler Master N600 (KWN1) - Getting the Basics Right
The Cooler Master N600 (KWN1) mid-tower chassis boasts of excellent ventilation options with support for large radiators of liquid cooling kits too. We take a quick look to see how easy it is to setup.

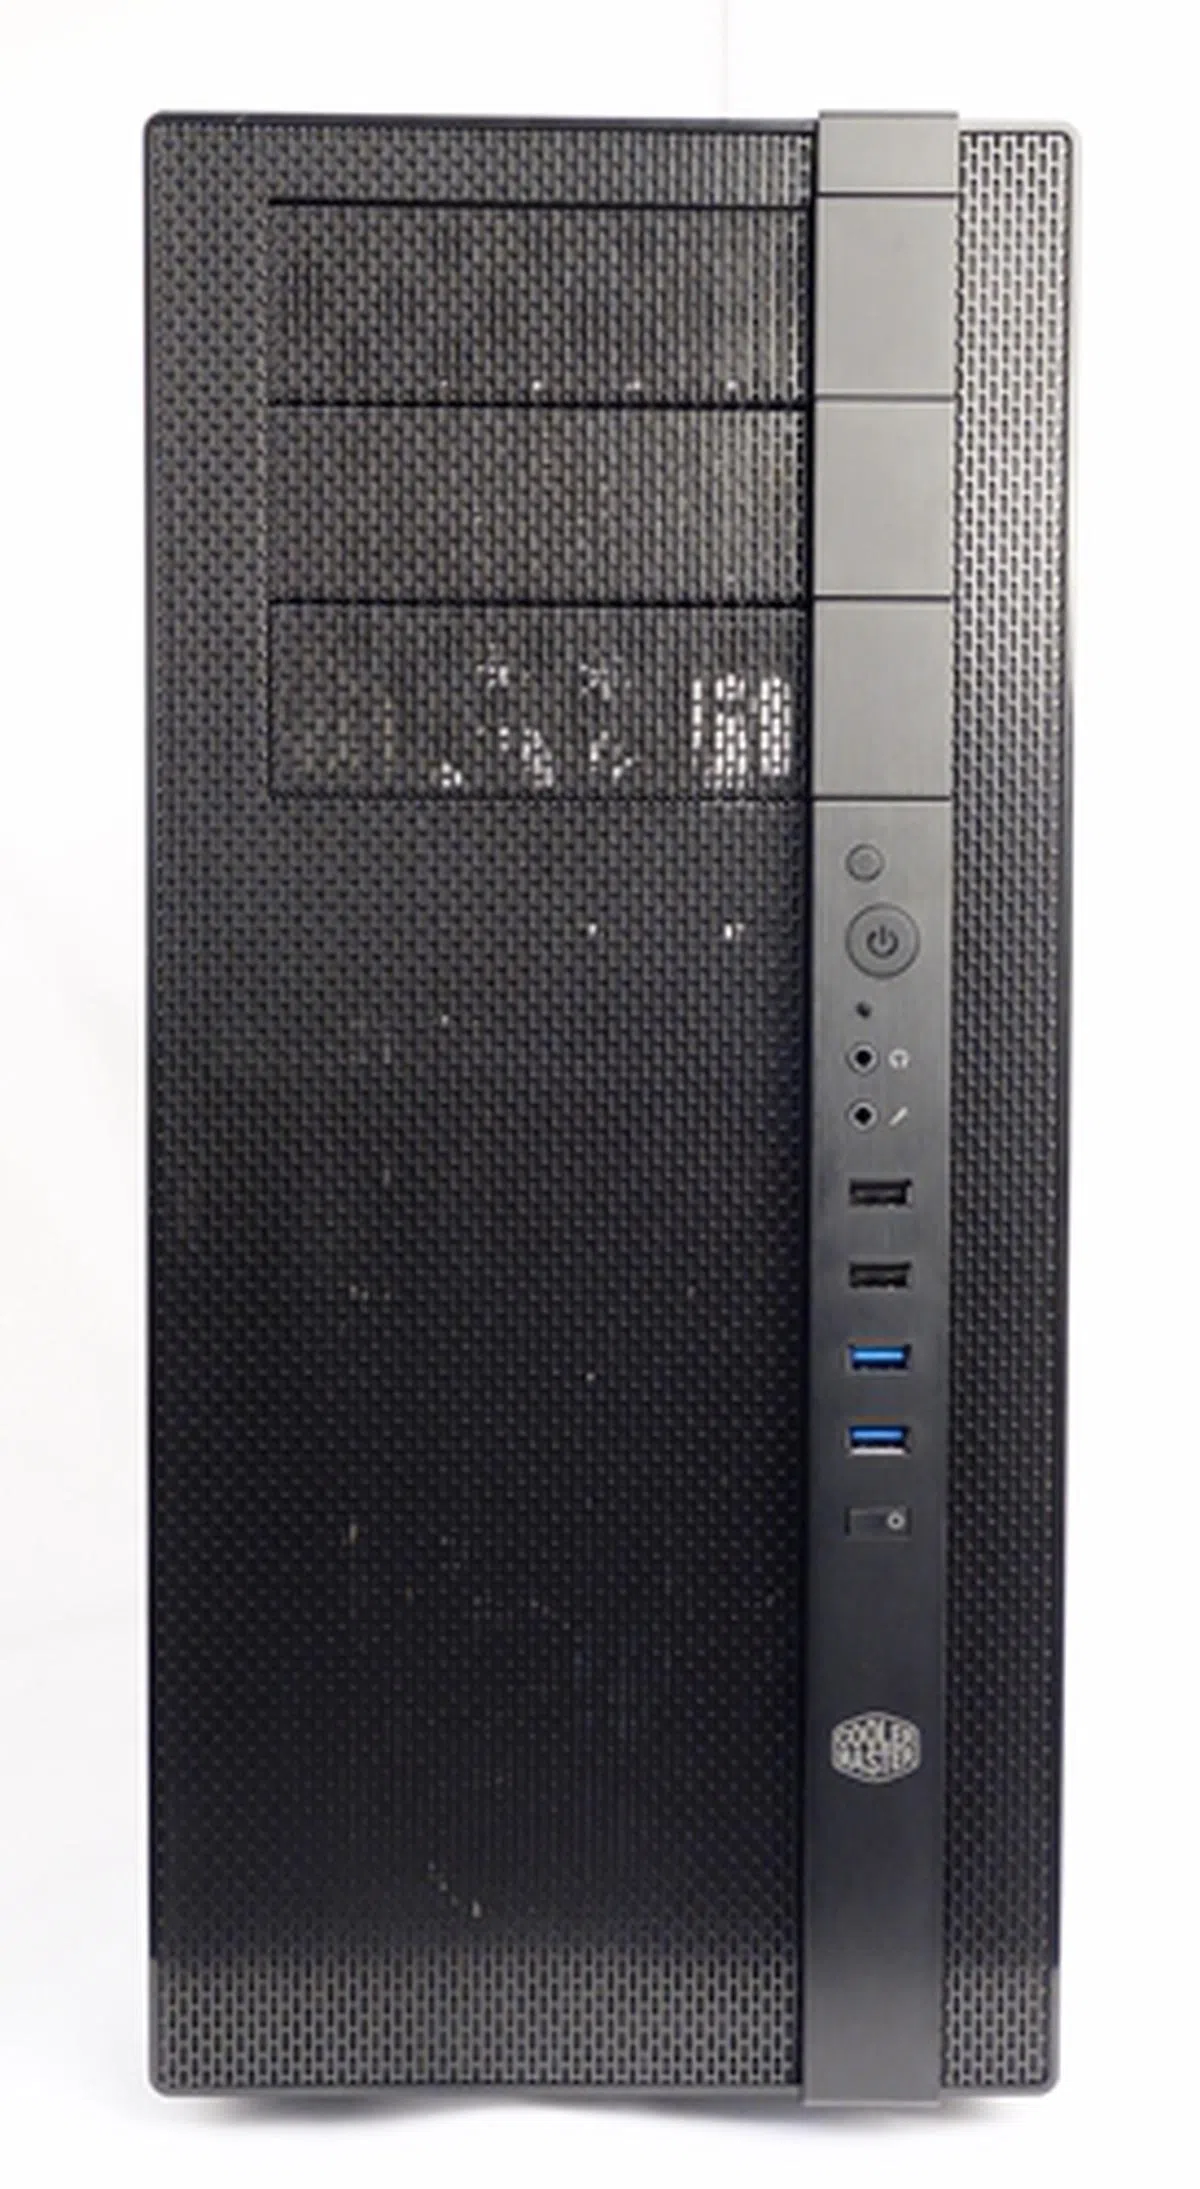
Cooler Master N600 (KWN1)
The Cooler Master N600 mid-tower series is one of the three N-series that was launched in June this year, which is right after Computex 2013 where Cooler Master already showcased a number of new offerings. While initially launched with N200 and N400 models, it has recently grown to also include N300 and N500 models. The main design parameters of the N-series is the that the full mesh design takes center stage throughout the casings' front, has plenty of fan mounting options, easy installation of large liquid cooling kits and is relatively affordable. While appearances are subjective, these goals have made the N-series look rather simple, perhaps even bordering cheap due to the glossy plastic strip surrounding the metal mesh design.

The KWN1 model of the N600 series has a clear acrylic side panel to show off its interior. It has excellent ventilation options and even support for liquid cooling systems.
The N600 series is considered the top-end of the N-series. Besides a design with cooling performance in mind, the N600 series caters for storage expandability as it features a removable HDD/SSD combo cage. As such, the N600 can support very long graphics cards while still being a mid-tower chassis; this ensures additional space for larger build components. The N600 series has four variants; they share the same internal design, but with some slight modifications such as side window, fan light and fan control options. To differentiate the four configurations, Cooler Master has captured the details clearly on their site. We've got the best of the variants, the N600 KWN1, so let us take a quick look at the specifications before we share our experience with the casing:-
Casing Dimensions &Specifications |
|
Drive Bays &Expansions Slots / Ports |
|
Case Cooling |
|
Power Supply |
|
External Design and Features
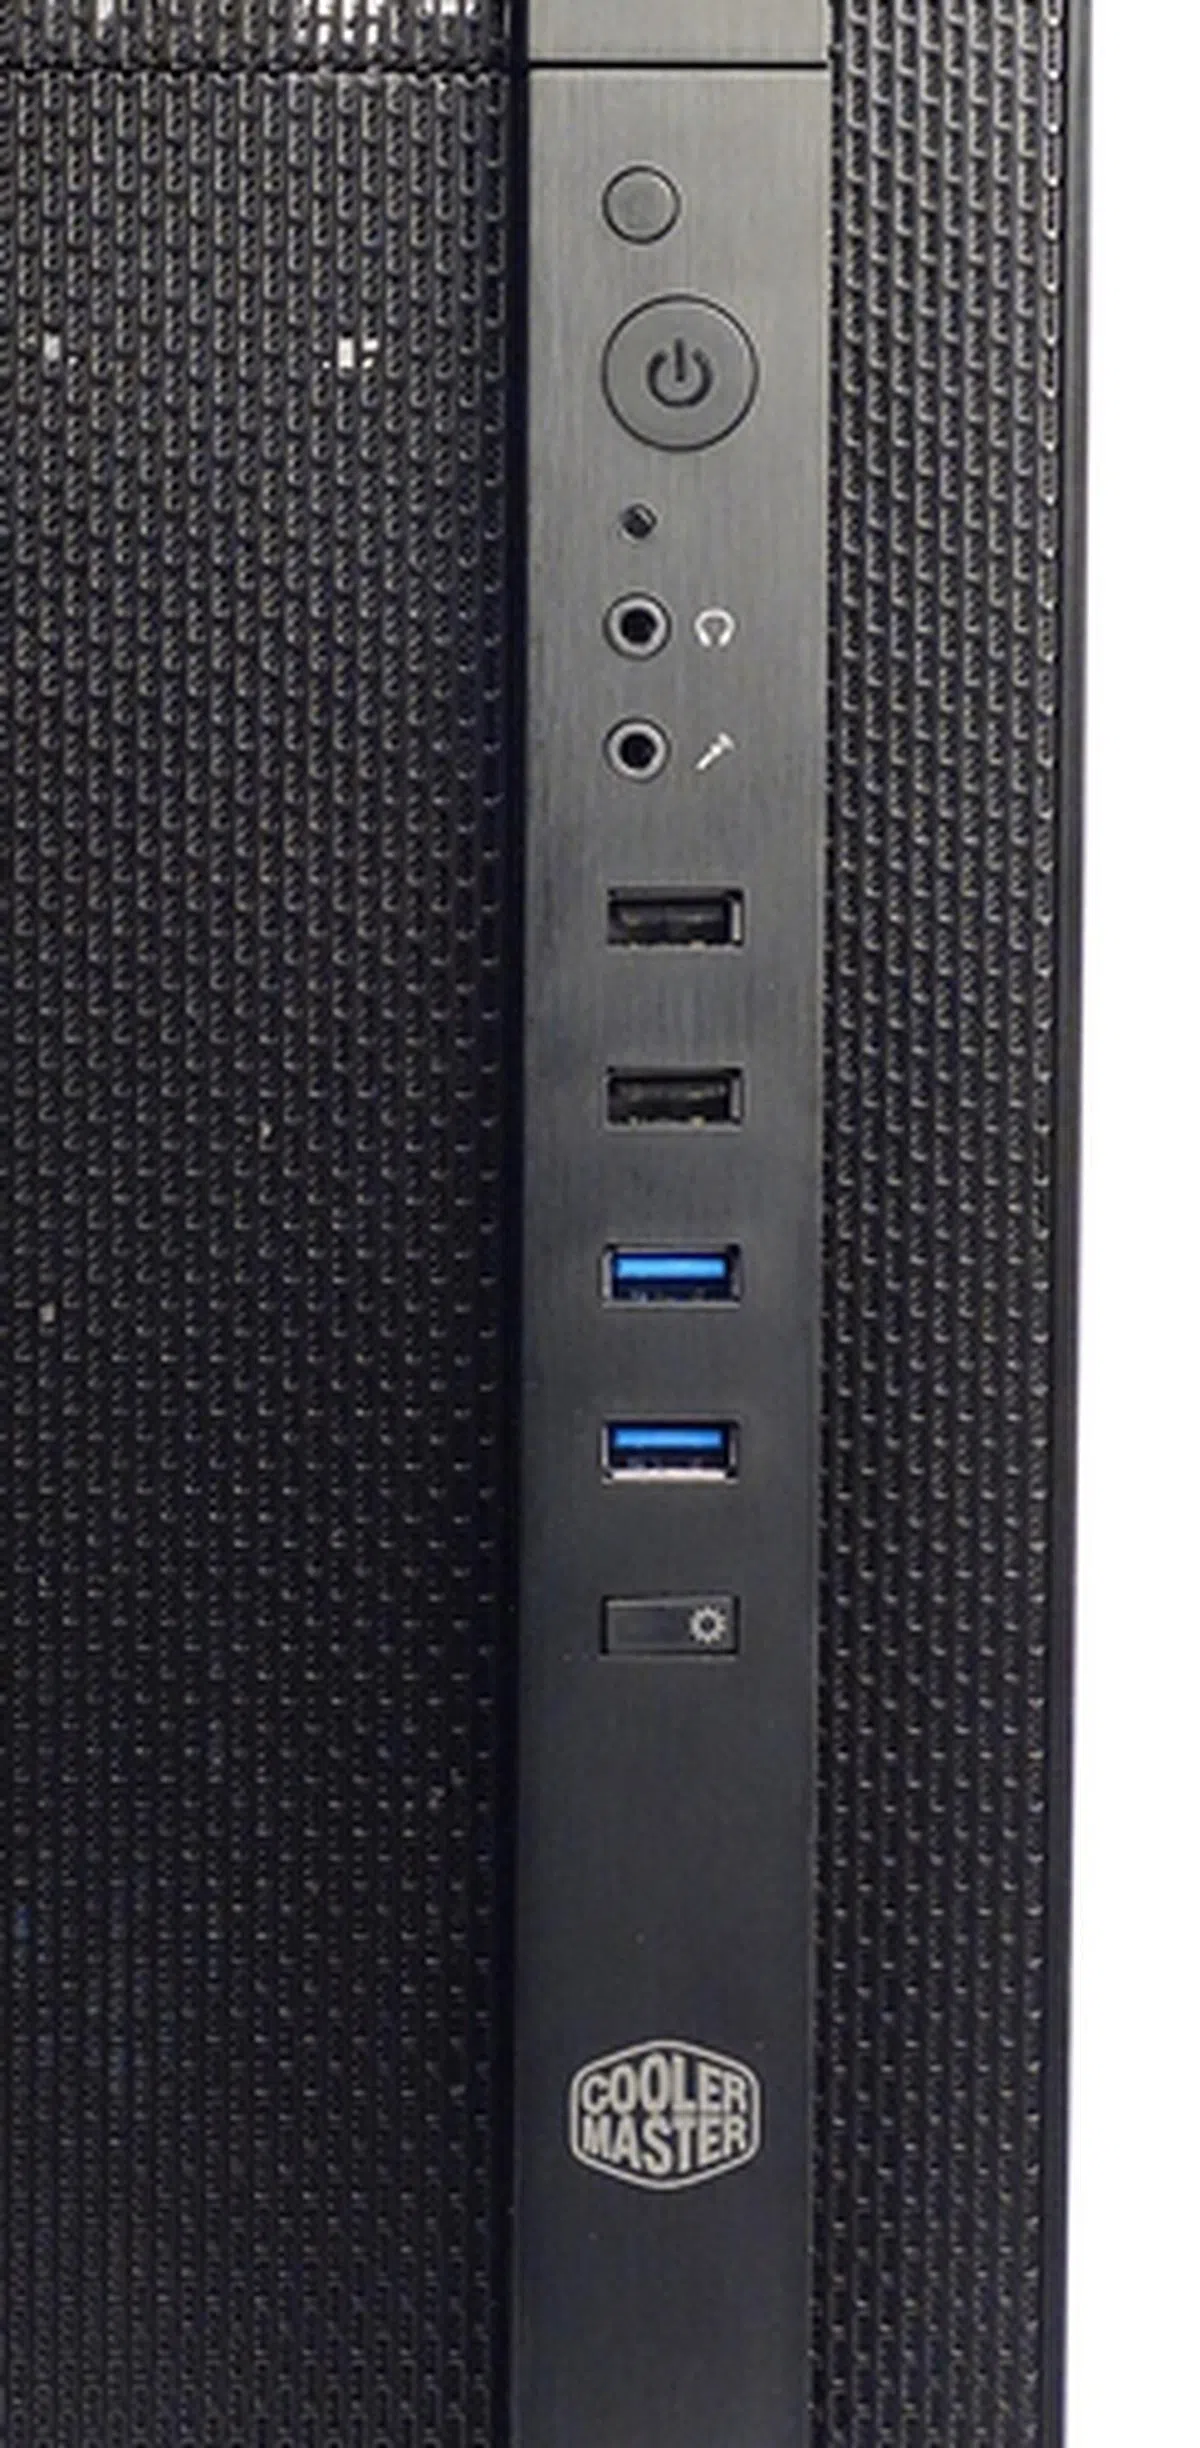
The Cooler Master N600 KWN1 has cooling performance built into its design DNA. As mentioned earlier, its entire front panel is made up of a fine steel mesh, save for a thin plastic bezel (which is given a brushed metal finish) that houses the following; the reset and power buttons, the audio ports, a pair of black USB 2.0 ports, a pair of USB 3.0 ports in blue, and a fan LED control button. The last button allows you to power on or off the white LED light from the bundled Xtraflow front intake fan.
On the right panel of the chassis, there are ventilation holes for the single 120mm intake fan or a 240mm radiator of a liquid cooling system. The mounting options for them can only be viewed after this side panel has been removed.

The panel opposite the clear acrylic window, offers ventilation holes for the optional 120mm intake fan or 240mm radiator.
At the top of the chassis, we can see the options to mount a pair of 120- or 140mm outlet fans, or a 240mm radiator.

The top of the chassis is bare, except for the options to mount the outlet fans.
At the rear of the chassis, we see the bundled 120mm Xtraflow outlet fan, which can be removed to install a 120mm radiator of a liquid cooling system. We also see a pair of rubber grommets, above the outlet fan, which will likely to remain unused as they are meant for pipes of external liquid cooling kits. Such kits are rarely used these days other than hardcore users who make custom radiators. You'll find the usual seven expansion slots for your add-on card and there's even an additional slot adjacent to this group for mounting extra USB/eSATA ports from your motherboard's expansion header(s).

At the rear of the chassis, we see seven expansions slots, an adjacent extra expansion slot and a pair of rubber grommets (that may become obsolete in mainstream chassis).
At the top left corner of the chassis' rear, the N600 KWN1 variant has a fan switch that controls the speed of the bundled pair of 120mm Xtraflow fans.

The fan switch controls both the front intake 120mm Xtraflow fan and the rear outlet 120mm Xtraflow fan. Also note that the front fan has a white LED that is controlled by a dedicated fan LED button on the front control strip.
Tipping the chassis to its side, we see the removable bottom dust filter. There are options to mount a single 120mm intake fan.

There is a removable dust filter at the bottom of the chassis.

Removing the dust filter, we can see that there are ample ventilation holes at the bottom for the exhaust fan of the power supply unit and the optional outlet fan.
Interior Design and Features
After removing the front panel, we can see the 120mm Xtraflow fan with white LED. The exposed control panel stack must be removed, in the event of a need to mount additional front intake fans. This is certainly not very convenient.

The bundled front intake 120mm Xtraflow fan, with white LED, can be seen clearly after the mesh wire front cover had been removed.
The chassis has a removable HDD/SDD combo cage, and with the bundled drive rails, the case is able to fit up to seven 3.5-inch HDDs. The combo cage can fit up to four 3.5-inch HDDs, and the fixed bottom enclosure takes up to three such drives.

The removable HDD/SDD combo cage can fit up to four drives.
The cage can be reconfigured to fit four 2.5-inch drives. At the same time, it can be removed altogether to accommodate long graphics cards. Configuring the combo cage isn't a tool-free affair as it involved fiddling with a number of M3 mounting screws and re-positioning the cage's side panel. Only the installation of the optical drives can be perform without the use of tools.

The combo cage can be quickly configured to accommodate 2.5-inch drives.
The motherboard tray has an extremely large cutout for mounting custom CPU coolers. There are also cable management cutouts that are covered with flimsy rubber grommets.

The motherboard tray has a large cutout for mounting CPU coolers. Its cable management cutouts are covered with flimsy rubber grommets.

Over at the rear, we see the 120mm Xtraflow outlet fan.
The top of the chassis has a removable dust filter. According to Cooler Master, there are options to mount a pair of 120- or 140mm outlet fans or a 240mm radiator.

Installation and Conclusion
As mentioned earlier, only the installation of the ODDs were a tool-free affair as fixing up our test build components involved heavy usage of our Philips head screwdriver.

The installed components in the N600 chassis. We admit, this shot was taken without any cable management as the photo was meant to quickly highlight how much space you're left with once the key components are put together.<br><br>
(Editor's note: the casing has since been sent back, but we'll strive to take better installation shots for our future reviews.)
Turning to the rear of the motherboard tray, there are options to mount a single 2.5-inch drive. Below the 5.25-inch ODD drive bay, we see the mounting options for the side 120mm intake fan.

We powered on the system to see the lighting effect of the Xtraflow fan.

The front 120mm intake Xtraflow fan operating with its white LED turned on.
Conclusion
It appears Cooler Master is right on the money with the N600 series. We have no serious complaints with the KWN1 variant of the series, except that the we would have preferred a slightly better finish, less use of tools and more flexible drive trays like those we saw in the CM 690 III casing

Cooling is truly in the DNA of the N600 series.
The casing's removable HDD/SDD combo cage offers much flexibility to the configuration of the interior of the chassis. We are able to install more 3.5-inch drives, especially if we are building a file and storage system. It can also allow us to accommodate more 2.5-inch drives. In the event of freeing up capacity, we can opt to remove the cage entirely. Given today's system building needs, the casing's versatility will appeal to many users. However, we wish the case was more tool-free in nature. The bundled drive rails meant extra work for us to secure them to their respective drives; it's not a tough job, but less work is always beneficial.
In addition, we are impressive with the excellent cooling features of the chassis. True to the casing's DNA that's designed to accommodate plenty of cooling options, the chassis supports a total of ten cooling fans. If air cooling isn't sufficient, the KWN1 supports liquid cooling. But it is advisable to check the manual carefully to ensure you've enough clearance to mount your desired liquid cooling kit. This is because our suspicions, though they may be unfounded, that Cooler Master may be cutting too close to the bone, by touting support for 240mm radiators for liquid cooling systems. For a typical mid-tower chassis, space can quickly become constrained when trying to outfit such large radiators. To be perfectly sure and save time, you could opt for some of Cooler Master's own Seidon liquid cooling kits that have been checked and recommended on the N600's product page.
If you are sticking strictly to the air-cooling route, you can throw caution to the wind as the N600 chassis already has a pair of bundled cooling fans, along with ample ventilation options to keep your system running cool.
From a functional standpoint, the casing address all the basic needs, but at the same time, we've also seen better options for its recommend retail price of S$129 and come out looking better.
Our articles may contain affiliate links. If you buy through these links, we may earn a small commission.